Winter Sowing
What is Winter Sowing?
Winter sowing is a great method for getting a jump on spring growing. This gardening trick is all about planting your seeds outside right in the middle of winter —snow and all! It's easy and works if you've never started seeds before. You skip the clutter and tending needs of indoor seed starting and no need to harden them off.
Mother Nature will do the work. You save time, space, and money. Grab some seeds, a few recycled containers, and let's turn the frosty outdoors into your secret gardening weapon. Keep reading for the simple steps that'll make you the envy of every green thumb around! Y
When Should I Start Winter Sowing?
In zone 6b, you can winter sow between late December through February. This timeframe allows seeds to undergo the necessary freeze-thaw cycles to break dormancy through stratification. For seeds requiring a chill period, start at least 4-5 weeks before the last hard frost to ensure optimal germination. However, if the seeds do not need stratification, you can sow them later within this window. The key is aligning the sowing time with the specific needs of your seeds and the natural climate patterns in your area.
How do I know the right planting depth?
When planting seeds, aim to cover them with soil to a depth of two to three times their width. Smaller seeds, like lettuce, should remain close to the surface since they need light to germinate, while larger seeds, such as pumpkin, thrive when planted about an inch deep. Proper depth helps seedlings grow strong and reach the surface efficiently.
Which seeds are best for winter sowing?
Perennials are ideal because they require cold stratification to break dormancy. These include echinacea, lupines, black-eyed Susan, shasta daisy, milkweed, foxglove, columbines, coreopsis, yarrow, poppies, and foxgloves offering years of continuous blooms.
Hardy "Self-Seeding" Annuals: These plants thrive in cooler temperatures and readily germinate outdoors. Think larkspur, bachelor buttons, calendula, cosmos, sweet peas, snapdragons, dianthus and nigella.
Herbs including thyme, oregano, sage, mint, parsley, lavender, and hyssop.
Cool-Season Crops: These leafy greens relish the chill. Arugula, spinach, cabbage, broccoli, kale, lettuce, and peas are eager to jumpstart your spring salads and stir-fries.
Root Vegetables: While often associated with summer, root vegetables such as carrots, beets, and radishes thrive with a winter chill. Sowing them during the cold months allows for early maturation and helps prevent bolting in hot weather.
Gather Supplies:
empty milk, water or any food safe translucent container
sharp scissors or knife
duct tape
seeds
quality potting soil
spray bottle with water
labeling tools - oil based permanent market is best. Sharpie will work on the interior label.
plant labels (optional)
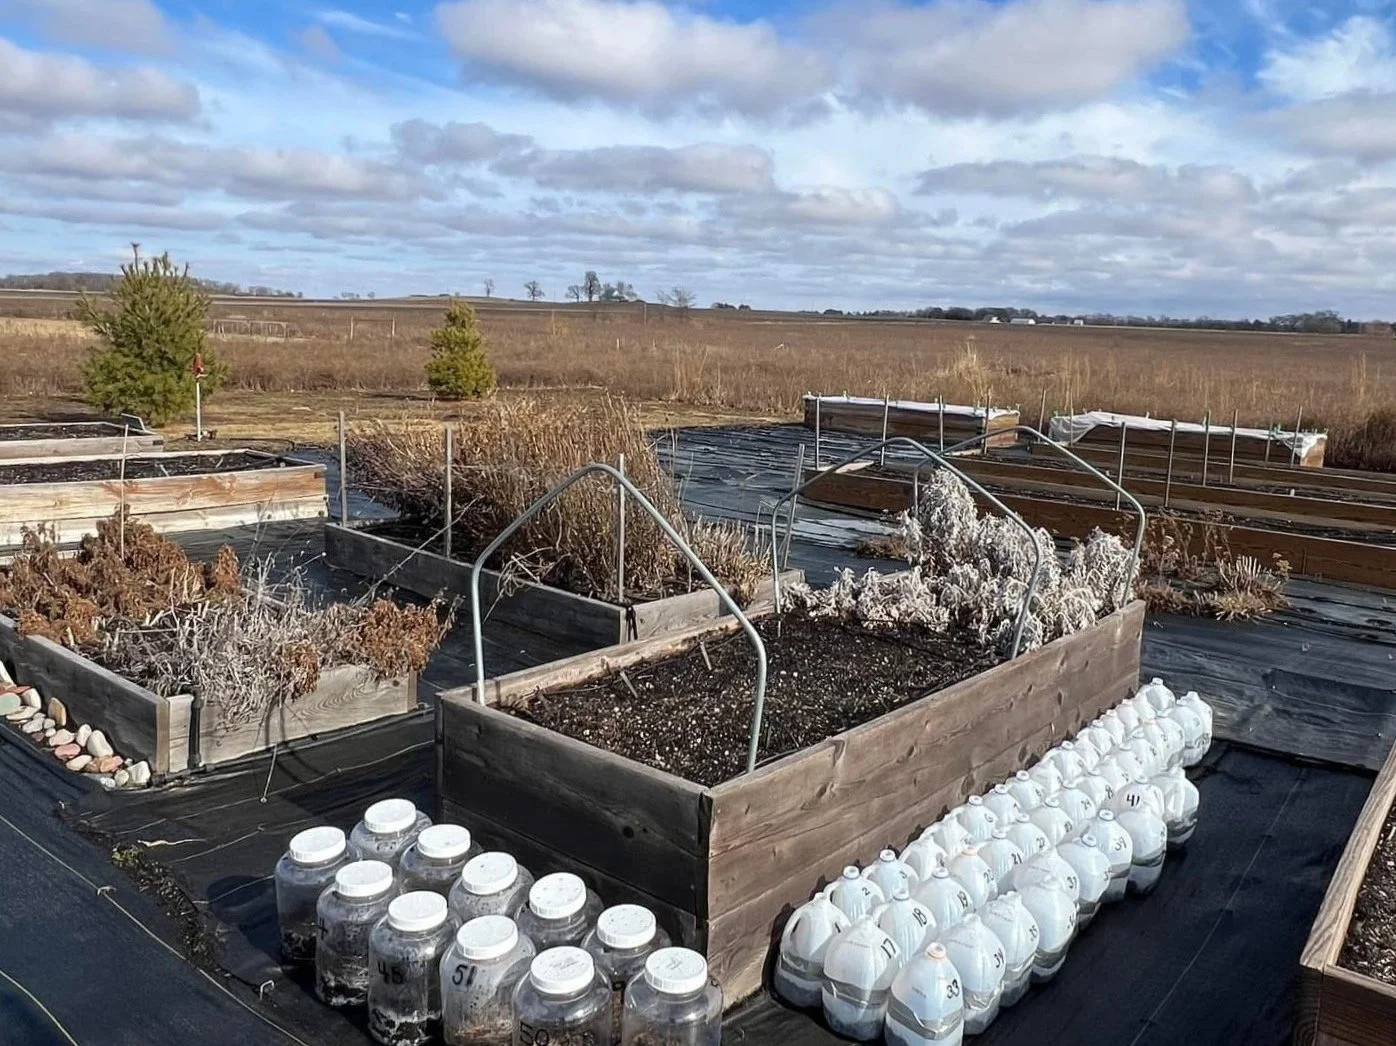
Prepare containers. Remove and discard the cap. Wash them throughly. Drill or poke 6-8 drain holes in the bottom and 2 holes 1" up from the bottom of each jug. Cut around the center of the jug having at least 6" from the bottom. Be sure to leave the handle intact. This will create a hinge for your jug. Also note, it’s easier to drill / cut holes before the container is split.
Prepare the soil. Wet quality potting soil. Fill the bottom half of the jug with at least 4" of soil.
Sow your seeds. Sow 1 seed type per container. Don’t cover the seeds too deep even if the pack says to do so. When you are done, gently press the surface of the soil carefully to ensure seed to soil contact then spray lightly with water. Save the seed packets for future reference, if you choose. Note: The larger the seeds, sow fewer seeds.
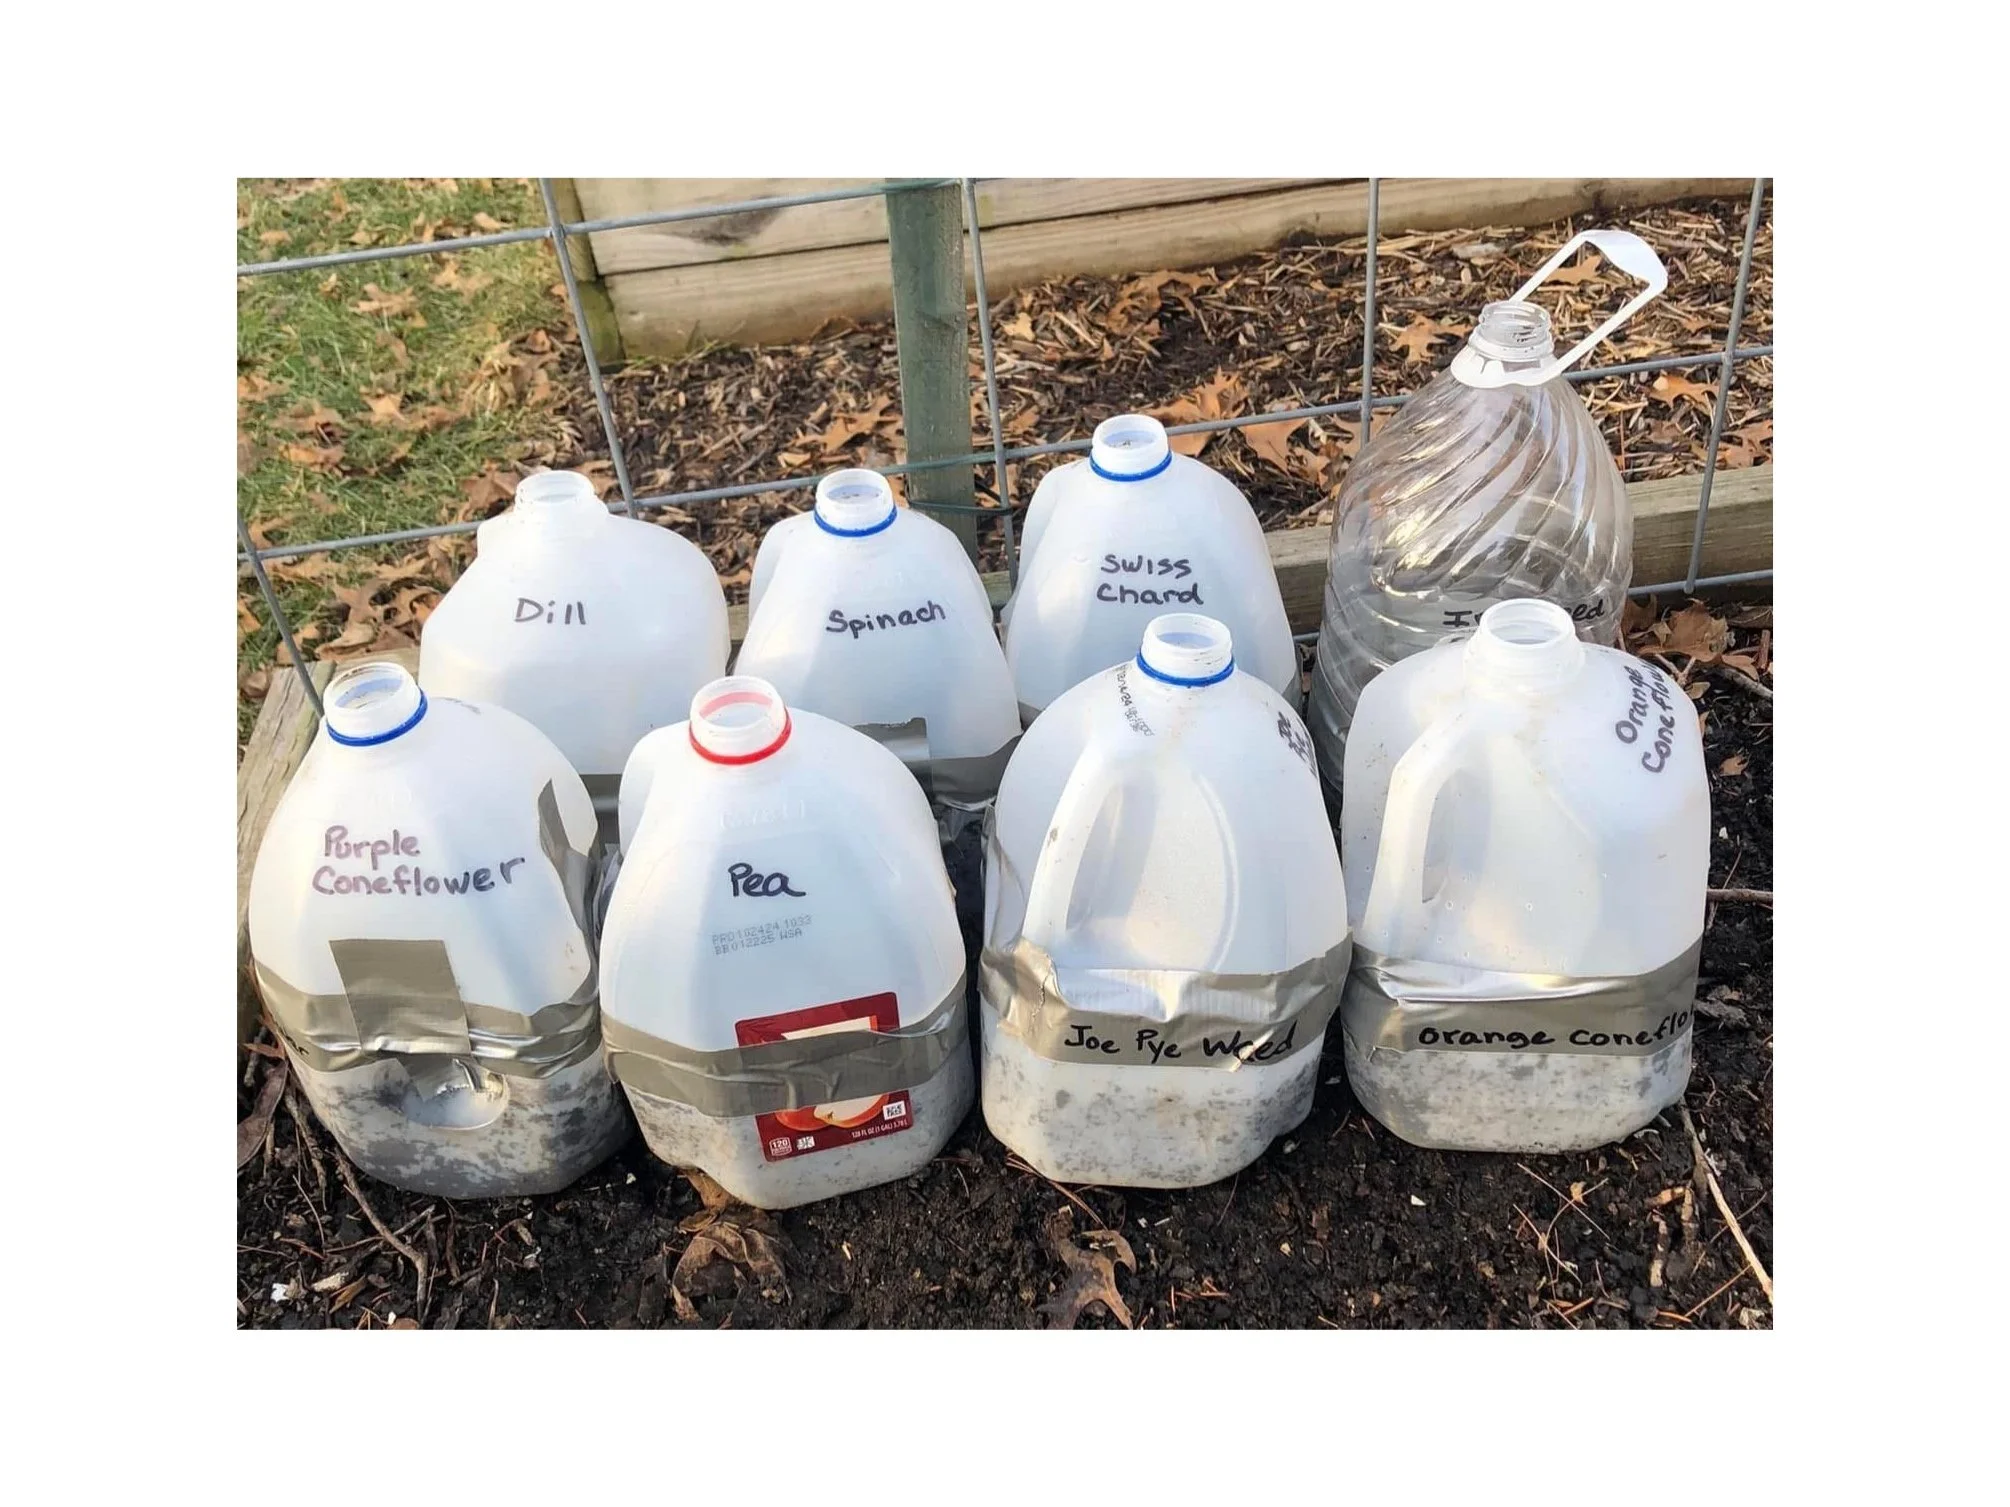
Jugs taped and labeled.
Label the jugs on the outside with a permanent marker and put another label on the inside (just in case).
Tape it closed with duck tape which works best. Ensure it’s secure and there aren’t any air holes. Remove the cap and place outside in a sunny location that receives sunlight and rain but is sheltered from wind. When temperatures heat up, place them in a shadier spot where they’ll receive moisture.
Care. You can forget them until it’s time to transplant them outside.

Let them be. Usually the jugs don’t need anything because the weather takes care of it. If it’s exceptionally dry, and there is no condensation on the jugs, you’ll want to spray water through the top. If the seeds have germinated and temps drop below freezing, cover with a blanket or cloth - not plastic.

Not ready yet …
Transplant time! The seeds should sprout and be ready to plant in the spring after the last hard frost and the second set of leaves form, it’s time to plan to transplant them. Take the tape off the containers and keep them closed. A day before transplant time, remove the top. Plant out on a cloudy day or late in the day. Water throughly and gently break seedlings roots apart and place in the ground. Water transplants in well for at least 7 days.